
The first step is to download the Docker installer from Docker website.
Install Docker by following the instructions and you are good to go. But the chances are you might run into a problem while running the Docker once installed.
Here are the most common issues you might run into while installing Docker.
Enable Virtualisation:
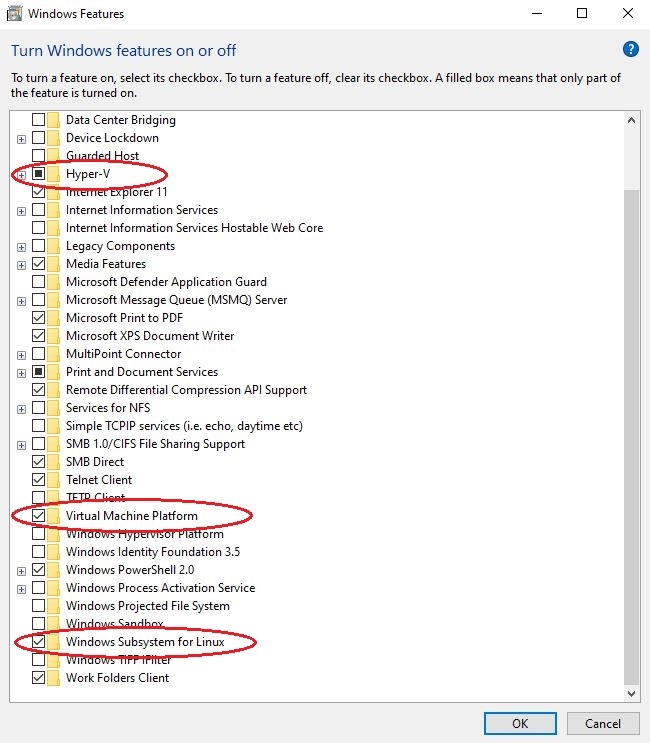
Docker requires Virtual Machine Platform and Windows Subsystem for Linux features enabled in your windows machine.
Enable Hyper-v and make sure the virtualisation is enabled in BIOS
Verify virtualization is enabled in Task manager > CPU, alternatively use systeminfo command in windows powershell.
A detailed information can be found on Docker documentation.
WSL2 Kernel Package:
Download and install the latest WSL2 Linux Kernel package
Once installed set WSL 2 as your default version. Use the following command in Windows PowerShell
wsl --set-default-version 2The next step is to install Linux OS of your choice.
Go to Microsoft store and install the OS of your choice. I will be installing Ubuntu 18.04 for this tutorial.
Once installed it will prompt you a terminal. It will take few minutes to set up the Ubuntu. You need to create a user and password for your Linux OS.
You can find more about WSL2 Linux kernel on Docker docs.
Congratulations!! you have successfully installed and set up a Linux OS within your windows operating system.
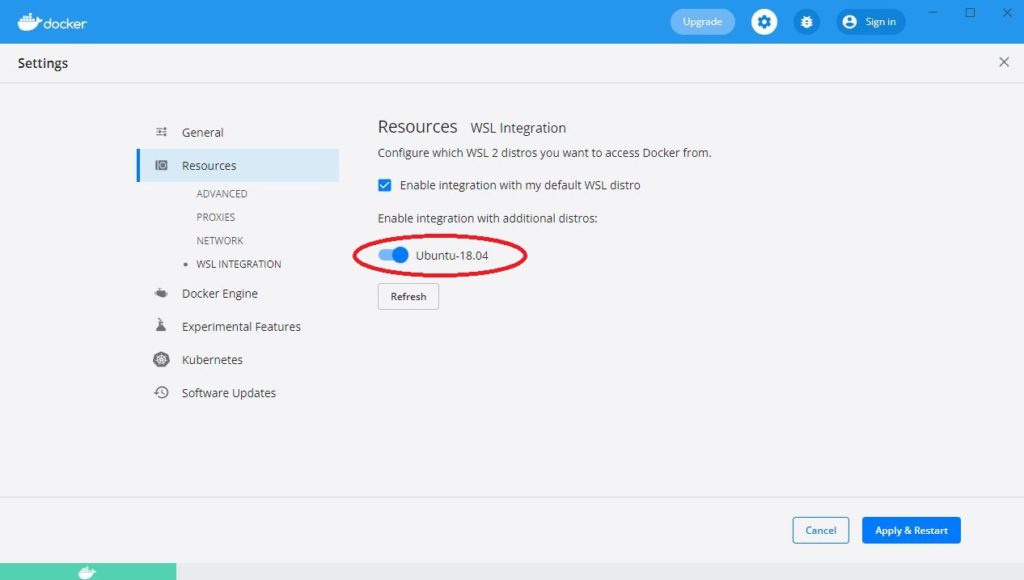
The final step is to enable WSL 2 in Docker.
Run the Docker and go to settings and verify enable Use the WSL 2 based engine in general tab.

Then go to Resources tab and select WSL integration and enable the installed Linux OS (Ubuntu-18.04).
Congratulations, you have now successfully installed Docker in your windows machine.